
Ready to wow your guests with a flowing chocolate fountain but not sure how to get the chocolate just right? You’re in the perfect place.
Preparing chocolate for a fountain isn’t as simple as melting it—it’s about achieving the perfect smooth, thin flow so every strawberry, marshmallow, or pretzel stick glides through a delicious river of chocolate. In this guide, you’ll learn easy steps to melt your chocolate perfectly, how to thin it without ruining the texture, and insider tips that keep your fountain running smoothly.
Keep reading to make your chocolate fountain the star of your next party!
Credit: www.livingrichlyonabudget.com
Choosing The Right Chocolate
Choosing the right chocolate is the first step to a successful chocolate fountain. The chocolate must flow smoothly and taste great. Not all chocolates work well in a fountain. Some chocolates are too thick or do not melt evenly. Picking the correct type ensures a beautiful and tasty fountain experience.
Couverture Vs Regular Chocolate
Couverture chocolate contains more cocoa butter than regular chocolate. This extra fat helps the chocolate melt smoothly. It flows easily in fountains without clumping or thickening. Regular chocolate has less cocoa butter and often needs thinning. Using couverture chocolate reduces the need to add extra oil or butter.
Best Chocolate Types For Smooth Flow
Dark, milk, and white chocolates all work in fountains if they have enough cocoa butter. Dark chocolate with 55-70% cocoa is popular for its rich taste and smooth flow. Milk chocolate is sweeter and creamier but may need a bit of oil added. White chocolate can be thick, so it usually requires thinning to keep it flowing well.
Quality And Flavor Considerations
Good quality chocolate improves flavor and texture. Avoid low-quality chocolate with fillers or artificial flavors. Choose chocolate with simple, natural ingredients for the best taste. The flavor should be pleasant and not too bitter or too sweet. Fresh chocolate also melts better and tastes richer in the fountain.
Melting Chocolate Properly
Melting chocolate properly is key for a smooth and flowing chocolate fountain. It ensures the chocolate melts evenly without burning. Using the right method helps keep the texture creamy and glossy. Avoiding lumps or grainy bits makes dipping easier and more enjoyable.
Two common ways to melt chocolate are the microwave method and the double boiler method. Each method gives good results if done carefully. Also, knowing how to avoid overheating protects the chocolate’s flavor and texture.
Microwave Method
Place chopped chocolate in a microwave-safe bowl. Heat it for 20 to 30 seconds at medium power. Stir the chocolate well after each interval. Repeat heating in short bursts until the chocolate is almost melted. Stir until smooth using the residual heat. Avoid heating for too long at once to prevent burning.
Double Boiler Method
Fill a pot with a small amount of water and bring to a gentle simmer. Put chopped chocolate in a heatproof bowl. Set the bowl over the pot, making sure it does not touch the water. Stir the chocolate constantly until fully melted and smooth. Remove from heat immediately to avoid overheating.
Avoiding Overheating
Chocolate burns easily if heated too fast or too long. Burnt chocolate tastes bitter and becomes grainy. Stir often to distribute heat evenly. Stop melting when small pieces remain and stir until melted. Keep the temperature below 115°F (46°C) for dark chocolate. Milk and white chocolate need even lower heat.
Thinning Chocolate For The Fountain
Thinning chocolate for a fountain is a crucial step for a smooth flow. Chocolate must be melted fully before adding anything. The goal is to get a thin, even stream that won’t clog the fountain. Thick chocolate can stop the fountain or cause uneven flow. Thin it carefully to keep the right texture and shine.
Adding Vegetable Oil
Vegetable oil is a common choice to thin chocolate. Add a small amount, like a teaspoon, at a time. Stir well after each addition to check the flow. Vegetable oil is neutral in flavor and does not change the taste. It helps make the chocolate run smoothly without being too oily.
Using Cocoa Butter Or Coconut Oil
Cocoa butter is the natural fat in chocolate and works well for thinning. It keeps the chocolate rich and glossy. Melt cocoa butter gently and mix it into the chocolate bit by bit. Coconut oil is another option that adds a mild flavor. Both oils help maintain a smooth, shiny finish.
How To Achieve Perfect Consistency
The ideal chocolate for fountains is thin but not watery. It should flow like warm syrup. Melt the chocolate completely using a double boiler or microwave. Add oil slowly and stir constantly. Test the flow by letting some chocolate run off a spoon. Adjust oil amount until the stream flows evenly and smoothly.
Common Mistakes To Avoid
Do not add water or milk to thin chocolate. These cause chocolate to seize and become grainy. Avoid adding too much oil; it will make chocolate too thin and greasy. Stir gently to avoid air bubbles. Never overheat chocolate or it can burn and lose shine. Thin chocolate carefully for the best fountain experience.
Credit: www.livingrichlyonabudget.com
Preparing The Fountain
Preparing the chocolate fountain properly ensures a smooth and enjoyable experience. This step involves cleaning the machine, warming it up, and checking the chocolate flow. Each task helps the fountain work perfectly and prevents common issues like clogs or uneven flow.
Cleaning And Setting Up
Start by cleaning the chocolate fountain thoroughly. Remove all parts and wash them with warm, soapy water. Dry each piece completely to avoid water mixing with the chocolate. Place the fountain on a stable surface near a power outlet. Assemble the fountain according to the manual instructions.
Preheating The Machine
Turn on the fountain’s heating element before adding chocolate. This preheats the machine and prevents the chocolate from cooling too fast. Allow the fountain to warm up for about 10 minutes. The heat will keep the chocolate fluid and ready to flow smoothly.
Testing Chocolate Flow
Pour a small amount of melted chocolate into the basin. Turn on the motor to start the chocolate flow. Watch how the chocolate rises and cascades down the tiers. Adjust the temperature if the chocolate moves too slowly or clogs the fountain. Proper flow means a glossy, even curtain of chocolate.
Tips For Maintaining Chocolate Flow
Maintaining a smooth chocolate flow is key for a perfect chocolate fountain experience. Thick or clumpy chocolate can stop the fountain from working well. Follow these simple tips to keep the chocolate flowing smoothly and look great throughout your event.
Keeping Chocolate Warm
Chocolate must stay warm to stay liquid and flow easily. Use the fountain’s built-in heater or a warming tray. Keep the temperature between 110°F and 120°F (43°C to 49°C). Too hot chocolate can burn, while too cool chocolate will thicken.
Check the temperature often with a food-safe thermometer. Cover the chocolate if the room is cold to keep the heat inside. Avoid direct heat sources that can cause uneven melting.
Stirring And Monitoring
Stir the chocolate gently while the fountain runs. This helps prevent lumps and keeps the texture smooth. Use a heat-resistant spatula to mix the chocolate evenly.
Watch for any signs of thickening or clumping. Stirring regularly keeps the chocolate consistent and flowing. Do not stir too fast or too hard, as this can create air bubbles.
Troubleshooting Thick Chocolate
If the chocolate becomes thick, add a small amount of vegetable oil or melted cocoa butter. Start with one teaspoon and stir well. This thins the chocolate and improves flow.
Avoid adding water, milk, or cream, which can cause the chocolate to seize. If thickening continues, warm the chocolate slightly and stir again.
Credit: hungryfan.com
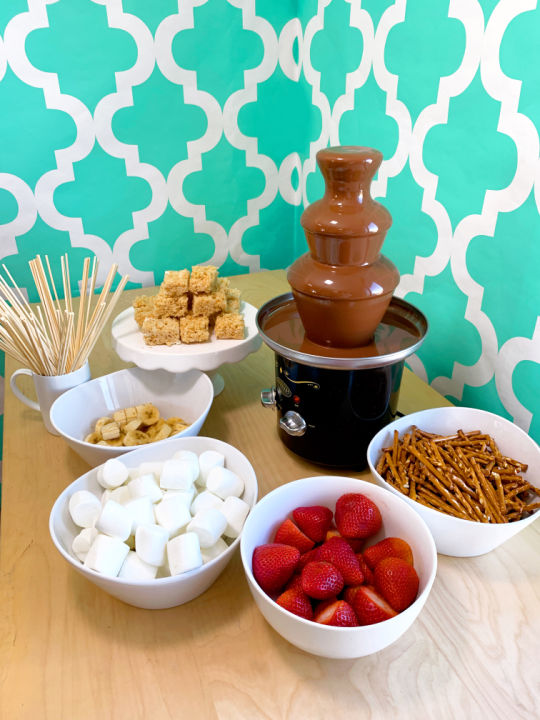
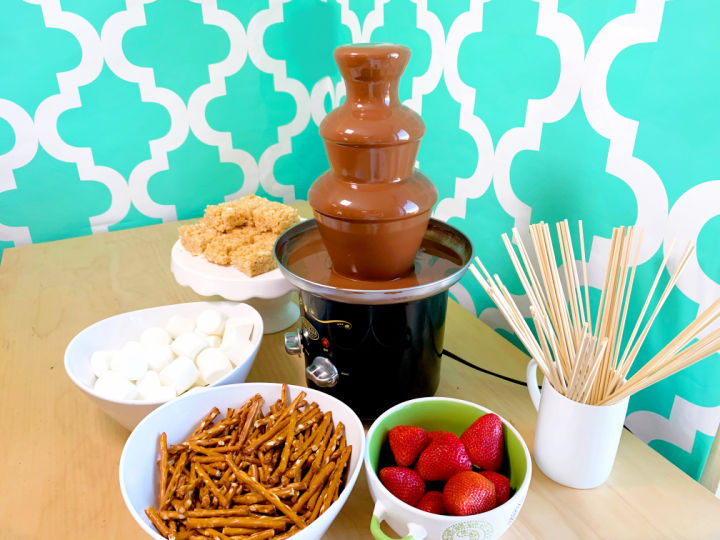
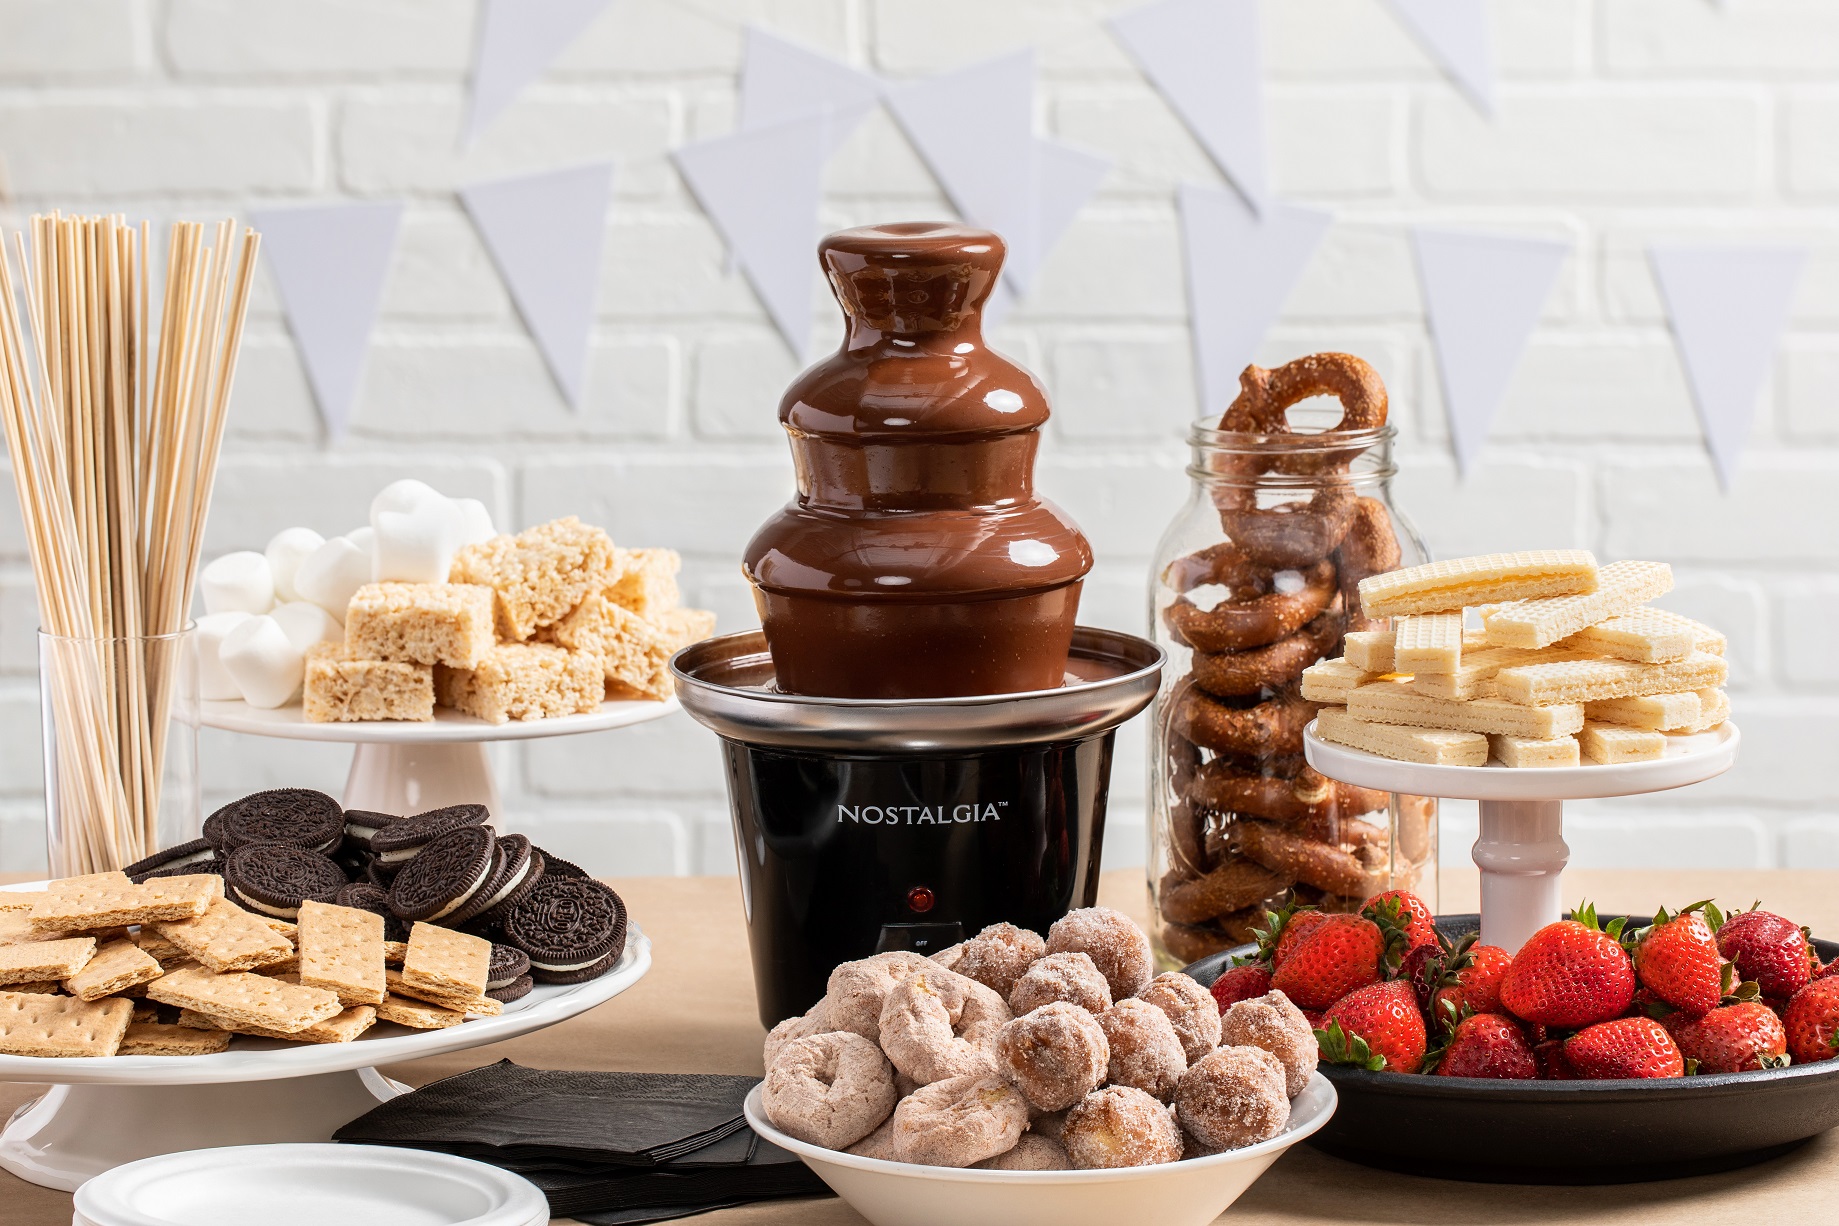
Dipping Ideas And Presentation
Dipping ideas and presentation play a big role in making chocolate fountains fun and delicious. Choosing the right dippables and arranging them nicely makes the experience more exciting. Presentation also helps keep things neat and easy to enjoy. Below are some popular dippables, creative ways to present, and tips for serving safely.
Popular Dippables
Fruits are classic and fresh dippables. Strawberries, banana slices, and apple wedges work well. Marshmallows add a soft, sweet touch. Pretzel sticks bring a salty crunch that pairs nicely with chocolate. Rice Krispies treats and cookies are also favorites. These options suit many tastes and textures for dipping fun.
Creative Presentation Tips
Arrange dippables on colorful platters or tiered trays. Use small bowls for nuts, sprinkles, or crushed candies nearby. Skewer fruits and marshmallows on wooden sticks for easy dipping. Group items by color or type for a neat look. Add fresh mint leaves or edible flowers for a decorative touch. These small ideas make your display inviting and stylish.
Serving And Safety
Place napkins and small plates near the fountain to catch drips. Use clean skewers or forks to avoid double dipping. Keep the fountain area clean and dry to prevent slips. Remind guests to dip only one item at a time. Turn off the fountain when not in use. These steps ensure a safe and pleasant chocolate fountain experience.
Frequently Asked Questions
Do You Melt Chocolate Before Putting Chocolate In The Fountain?
Yes, melt chocolate fully before adding it to the fountain. Add vegetable oil or cocoa butter to ensure smooth flow. Avoid water or cream to prevent seizing. Stir gently until the chocolate reaches a thin, flowing consistency perfect for the fountain.
How To Make The Best Chocolate For A Chocolate Fountain?
Melt high-quality couverture chocolate using a double boiler. Gradually stir in vegetable oil or cocoa butter to achieve smooth, flowing consistency. Avoid water or cream. Stir gently and add oil slowly to prevent over-thinning. Maintain moderate heat to prevent burning and ensure smooth chocolate flow in the fountain.
How To Thin Out Chocolate For A Chocolate Fountain?
Melt chocolate fully using a double boiler or microwave. Slowly stir in vegetable oil, cocoa butter, or coconut oil. Add oil gradually until the chocolate flows smoothly. Avoid water, milk, or cream to prevent seizing. Maintain gentle heat to keep chocolate from burning or thickening.
Should You Add Oil When Melting Chocolate For Dipping?
Yes, add a small amount of vegetable oil, cocoa butter, or coconut oil to melted chocolate for smoother dipping. Add slowly to avoid thinning too much. Avoid water, milk, or cream as they can seize the chocolate. Stir gently for a smooth, flowing consistency perfect for dipping.
Conclusion
Preparing chocolate for a fountain takes simple steps. Melt the chocolate slowly and stir well. Add a small amount of oil to make it smooth. Avoid water or milk, as they can spoil the texture. Keep stirring until the chocolate flows easily.
Use good quality chocolate for the best taste. With these tips, your chocolate fountain will work perfectly. Enjoy dipping fruits, marshmallows, or treats with silky chocolate. A little care makes your fountain fun and tasty.