
Have you ever wanted to bake your own sourdough bread but felt unsure where to start? Making sourdough in a loaf pan is easier than you think, and it gives you a perfect, uniform shape every time.
Imagine pulling a warm, golden loaf from your oven, with that satisfying crust and soft, tangy inside. In this guide, you’ll discover simple steps to create delicious sourdough bread right at home. Whether you’re a beginner or looking to improve your technique, this article will help you bake with confidence and enjoy fresh bread like never before.
Keep reading to unlock the secrets of sourdough in a loaf pan and impress yourself with every slice.
Gather Ingredients And Tools
Making sourdough in a loaf pan needs a few important things. You need the right ingredients and tools to bake bread that tastes great and looks nice. This section helps you prepare everything before starting to bake.
Essential Ingredients
Start with quality flour, like bread flour or all-purpose flour. You also need active sourdough starter to make the bread rise. Water should be clean and at room temperature. Salt is important for flavor and controls the fermentation. These four ingredients create the base for your sourdough loaf.
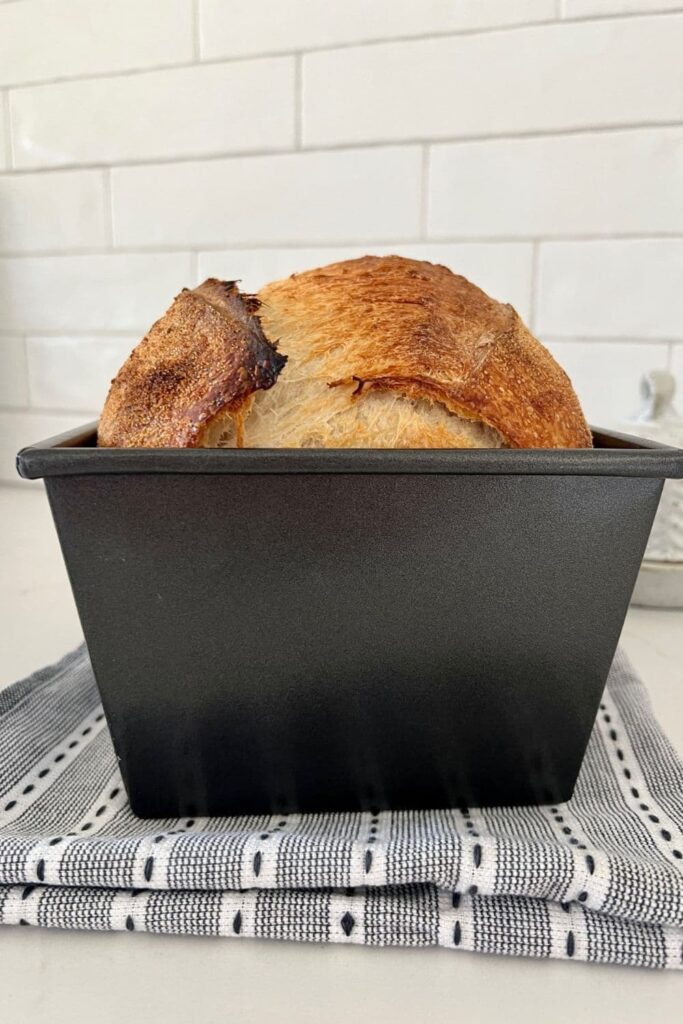
Choosing The Right Loaf Pan
Select a loaf pan that fits your oven size and bread shape. A metal pan heats evenly and gives a nice crust. Non-stick pans help to remove bread easily. The pan should be about 8×4 inches for a good loaf size. Avoid very deep or very shallow pans for best results.
Additional Tools
You need a large mixing bowl to mix dough. A kitchen scale helps measure ingredients exactly. A bench scraper is useful to handle sticky dough. A clean towel or plastic wrap covers dough during rising. A sharp knife or lame scores the dough before baking. These tools make the baking process easier and more precise.
Credit: www.pantrymama.com
Prepare The Sourdough Starter
Making sourdough starts with a lively starter. This natural mix of flour and water holds wild yeast and good bacteria. It gives your bread its unique taste and texture.
Preparing the starter right means your bread will rise well. It needs care and attention before baking day.
Feeding Your Starter
Feed your starter regularly to keep it active. Use equal parts flour and water. Mix them into the starter until smooth.
Feed it every 12 to 24 hours at room temperature. This keeps the yeast alive and strong. Discard some starter before feeding to avoid overflow.
Signs Of A Ready Starter
Look for bubbles on the surface and sides. This shows yeast is producing gas. The starter should double in size within 4 to 6 hours after feeding.
It will have a pleasant, slightly sour smell. If it looks very runny or smells bad, it needs more care.
A ready starter floats in water. Gently drop a spoonful in water. If it floats, it is ready to use for baking.
Mix The Dough
Mixing the dough is the first step to a great sourdough loaf. This step sets the base for texture and flavor. Careful mixing helps the ingredients come together well. It also starts gluten development, which is key for bread structure.
Combining Ingredients
Start by measuring your flour, water, starter, and salt accurately. Put the flour in a large bowl first. Next, add the water and sourdough starter. Use a spoon or your hands to mix until no dry flour remains. The dough will look rough and sticky.
After the starter and water mix, add salt last. Salt controls yeast activity and improves flavor. Mix it well into the dough. At this stage, the dough may feel loose but keep mixing gently.
Autolyse Process
Let the dough rest for 20 to 40 minutes after initial mixing. This rest is called autolyse. It helps flour absorb water fully. Gluten starts to form naturally during this time. The dough will feel smoother and easier to handle.
Skip adding salt during autolyse. Salt slows down this process. After resting, add salt and mix again. Autolyse improves dough texture and the final bread crumb.
Credit: bakedcollective.com
Knead And Fold The Dough
Kneading and folding the dough are key steps in making sourdough in a loaf pan. These actions develop gluten, which gives the bread structure and texture. Proper kneading and folding help the dough rise evenly and create a soft, chewy crumb.
Understanding these techniques makes the baking process easier and more enjoyable. Let’s explore simple methods to handle your sourdough dough effectively.
Techniques For Kneading
Kneading mixes the ingredients and strengthens the dough. Use the heel of your hand to push the dough forward. Then fold it back towards you. Turn the dough a quarter turn and repeat. This process takes about 8 to 10 minutes. The dough will become smooth and elastic. Avoid adding too much flour while kneading. A slightly sticky dough is good for sourdough.
Stretch And Fold Method
This method is gentle and helps build gluten without heavy kneading. Start by wetting your hand to prevent sticking. Lift one side of the dough and stretch it upward. Fold it over the rest of the dough. Rotate the bowl 90 degrees and repeat. Do this 3 to 4 times every 30 minutes during the first rise. This technique strengthens the dough and traps air for a better rise.
Bulk Fermentation
Bulk fermentation is a key step in making sourdough bread in a loaf pan. It is the time when the dough rests and grows after mixing. During this phase, natural yeast and bacteria work to develop flavor and texture. Proper bulk fermentation helps the dough rise well and makes the bread soft and airy.
Ideal Fermentation Time
Usually, bulk fermentation takes about 3 to 5 hours at room temperature. The exact time depends on the temperature and strength of your starter. Warmer kitchens speed up fermentation, while cooler ones slow it down. Watch your dough, not the clock. It should grow but not double in size during this stage.
How To Tell When Dough Has Risen
Check the dough by gently pressing it with a finger. If the indentation slowly fills back, the dough is ready. If it springs back quickly, it needs more time. If the dough collapses, it has over-fermented. Look for bubbles on the surface and a soft, airy feel. These signs show the dough has risen well and is ready for shaping.
Credit: makeitdough.com
Shape The Dough For The Loaf Pan
Shaping the dough properly is key for a perfect sourdough loaf in a pan. It helps the bread rise evenly and fit the pan well. Good shaping gives the bread a nice texture and crumb.
Take your time with shaping. Handle the dough gently to keep its air pockets. This makes the bread light and soft.
Pre-shaping Steps
Start by turning the dough onto a clean surface. Use a bench scraper to fold the dough onto itself gently. This creates a loose round shape.
Let the dough rest for 15 to 20 minutes. This rest relaxes the gluten and makes final shaping easier.
Final Shaping And Tension
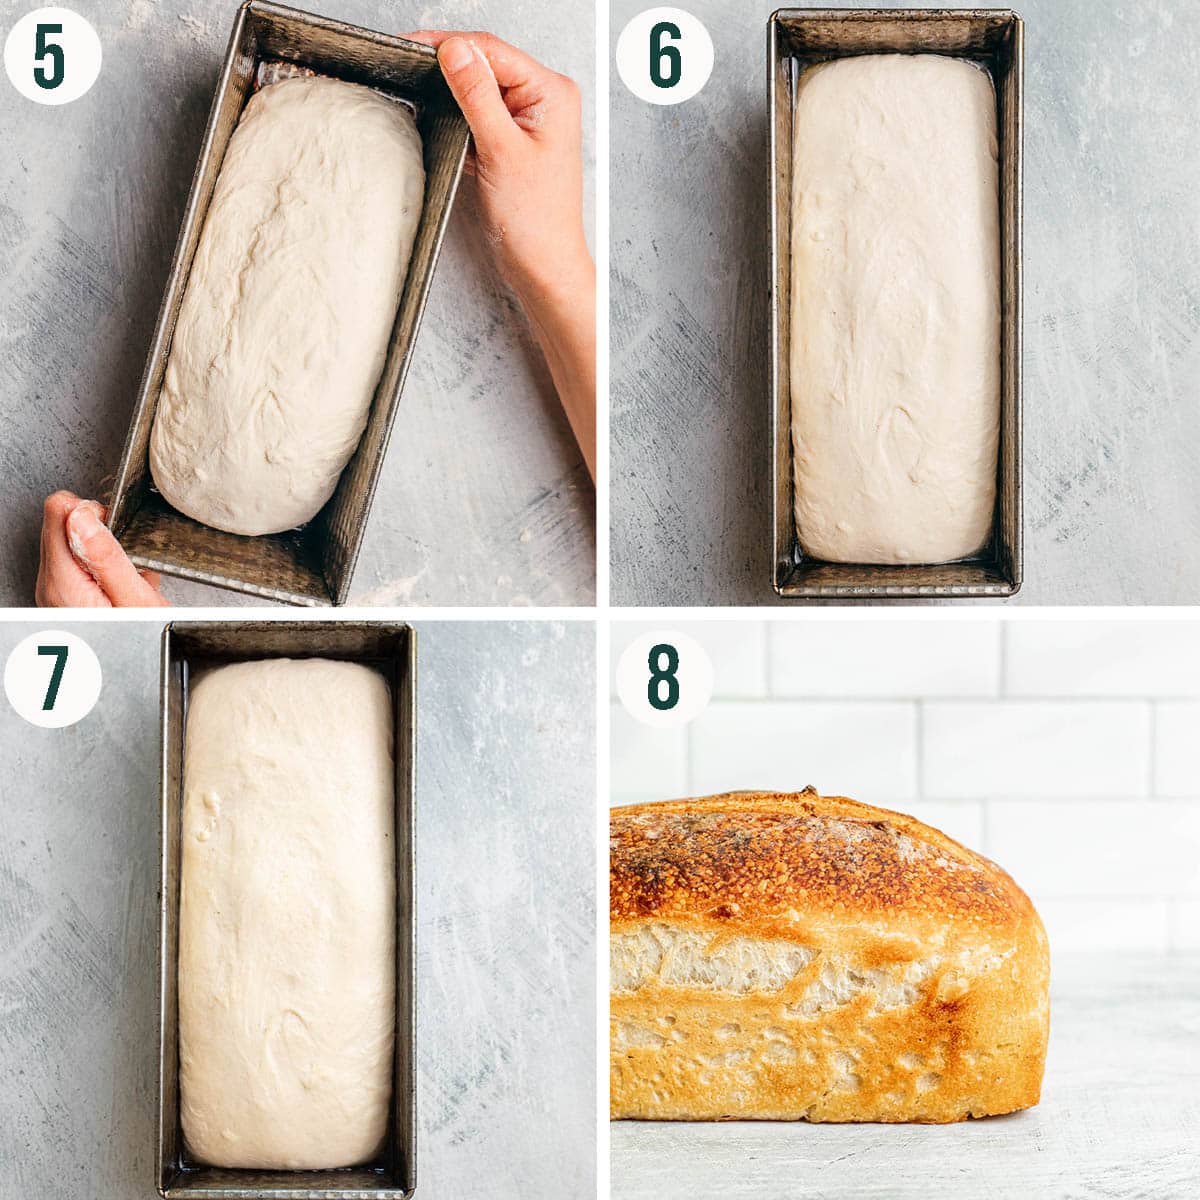
After resting, shape the dough to fit your loaf pan. Flatten it gently into a rectangle. Fold the sides inward, then roll it tightly.
Create tension by pulling the dough toward you on the surface. This tight skin helps the dough hold its shape while baking.
Place the dough seam side down in the greased loaf pan. Cover and let it rise until it fills the pan.
Proof The Dough
Proofing the dough is a key step in making sourdough in a loaf pan. This process lets the dough rise and develop flavor. Proper proofing creates a light, airy crumb and a good crust. It needs patience and the right conditions for the best results.
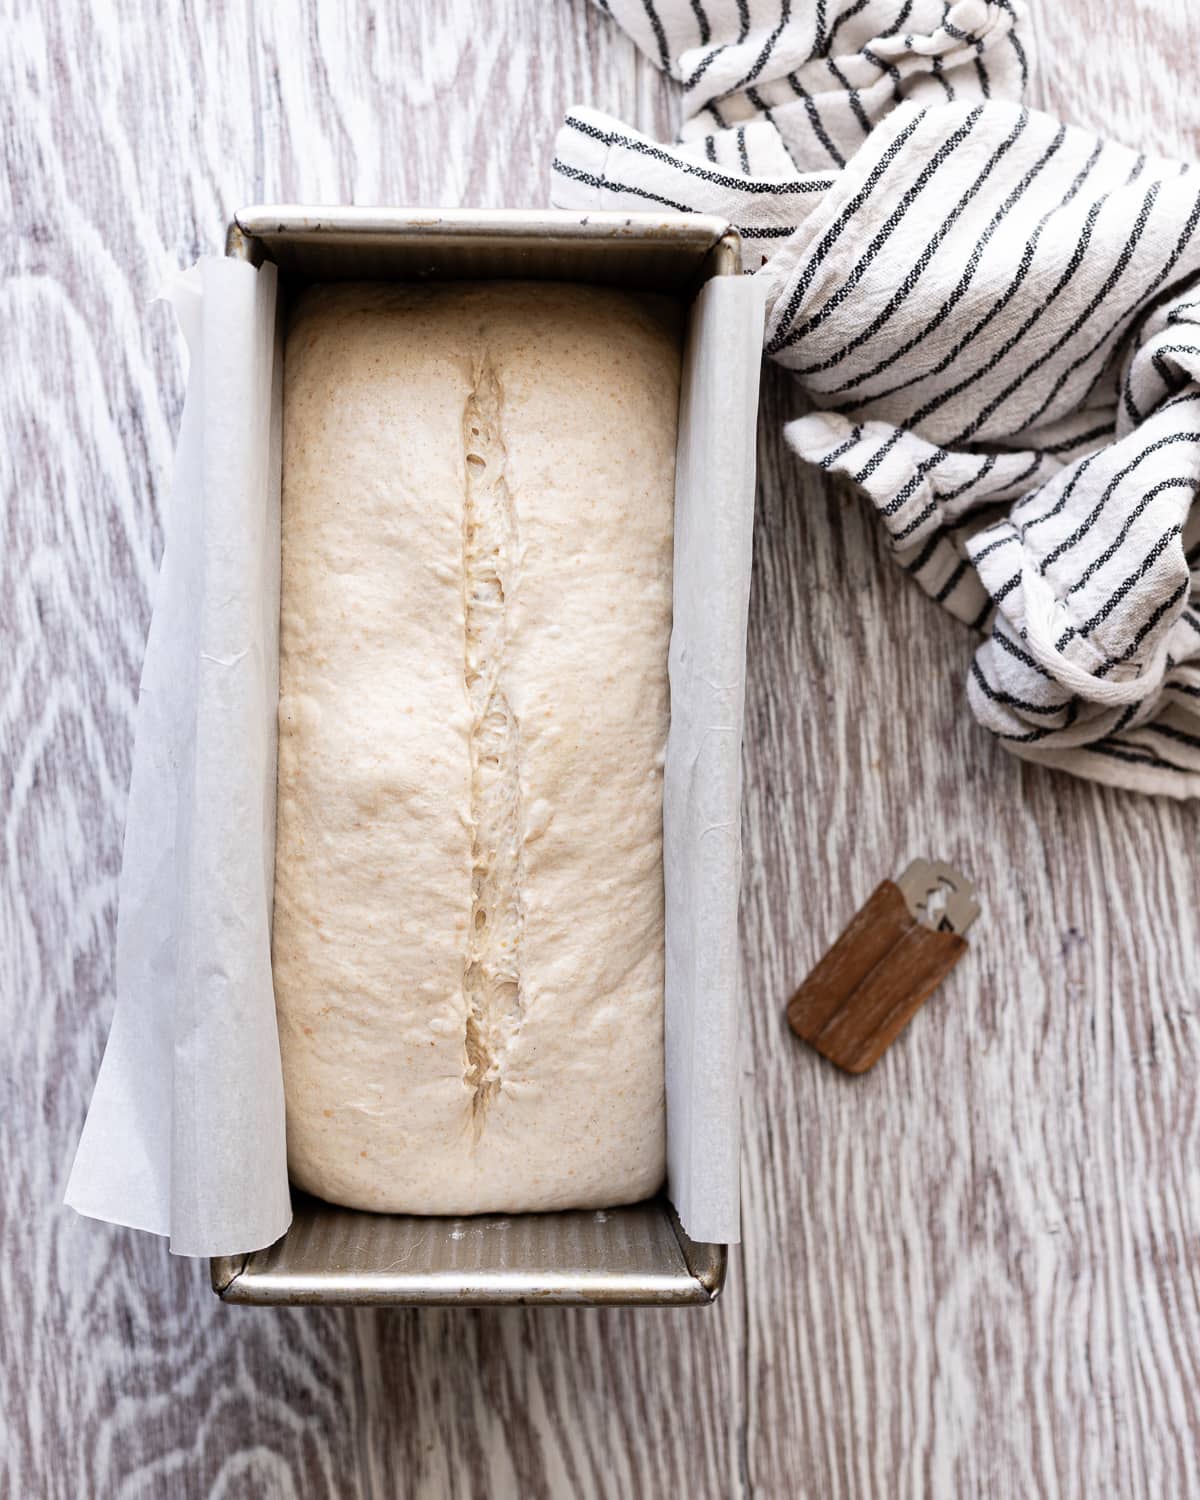
Proofing In The Loaf Pan
After shaping, place the dough gently into the loaf pan. Cover it lightly with a clean cloth or plastic wrap. This keeps the dough moist and stops it from drying out. The dough will slowly rise, filling the pan and softening in texture. Check the dough often. It should grow about 1.5 times its original size.
Temperature And Timing Tips
The best temperature for proofing sourdough is about 75°F (24°C). Cooler temperatures slow the rise and warmer ones speed it up. Avoid hot spots or drafts around the dough. Proofing usually takes 3 to 4 hours but can vary. Test the dough by gently pressing it with a finger. If the indentation springs back slowly, it is ready for baking.
Bake The Sourdough Loaf
Baking your sourdough loaf in a loaf pan shapes it perfectly and helps it rise evenly. This stage is important for developing the right texture and crust. Follow these steps carefully to get a golden, tasty bread.
Preheating The Oven
Set your oven to 450°F (230°C) before placing the bread inside. A hot oven helps the dough rise quickly at first. This is called oven spring. Preheat for at least 30 minutes to reach the right temperature.
Baking Time And Temperature
Place the loaf pan on the middle rack. Bake at 450°F (230°C) for the first 15 minutes. Then lower the temperature to 400°F (200°C). Bake for another 25 to 30 minutes until the crust is deep golden brown. The internal temperature should be 205°F (96°C).
Using Steam For Crust
Steam keeps the crust moist during the first baking minutes. This helps the loaf expand well and creates a shiny crust. Add a pan of hot water to the oven bottom or spray water on oven walls. Remove steam after 15 minutes to let the crust crisp up.
Cool And Store The Bread
After baking sourdough in a loaf pan, cooling and storing the bread properly is essential. This step keeps the bread fresh and tasty for longer. Proper cooling also helps the bread finish baking inside and keeps the crust crisp.
Proper Cooling Techniques
Remove the bread from the loaf pan carefully. Place it on a wire rack to cool. This allows air to flow around the bread. Do not wrap the bread while it is still warm. Wrapping traps steam and makes the crust soft. Let the bread cool for at least one hour. Cooling fully improves the texture and flavor.
Best Storage Practices
Store the cooled bread in a paper bag or bread box. These keep the crust crisp and the inside soft. Avoid plastic bags for long storage. Plastic traps moisture and can cause mold. For longer freshness, slice the bread and freeze it. Use airtight bags to protect from freezer burn. Toast frozen slices directly or thaw at room temperature.
Frequently Asked Questions
How Long Does Sourdough Take To Rise In A Loaf Pan?
Sourdough typically takes 4 to 6 hours to rise in a loaf pan. The time varies with room temperature and starter activity. Warmer environments speed up rising, while cooler ones slow it down. Always look for the dough to double in size before baking.
Can I Use Any Loaf Pan For Sourdough Bread?
You can use most loaf pans, but metal or glass pans work best. They provide even heat distribution and promote a good crust. Avoid overly non-stick pans, as they may affect crust formation. Ensure your pan is clean and lightly greased before use.
How Do I Prevent Sourdough From Sticking To The Pan?
To prevent sticking, grease your loaf pan with oil or butter before placing the dough. Alternatively, use parchment paper lining for easy removal. Proper greasing helps maintain the bread’s shape and ensures a clean release after baking.
What Temperature Should I Bake Sourdough In A Loaf Pan?
Bake sourdough at 425°F (220°C) for about 30 to 40 minutes. Start with a higher temperature for crust development, then reduce if needed. Use an oven thermometer for accuracy to ensure even baking and a perfect crust.
Conclusion
Making sourdough in a loaf pan is simple and fun. You just need patience and the right steps. The dough rises nicely and bakes evenly in the pan. This way, you get a beautiful, soft bread with a crispy crust.
Try different flours and baking times to find your favorite. Baking sourdough at home brings fresh, tasty bread to your table. Give it a try and enjoy the process!