
Cooking chicken breast on a cast iron skillet can seem tricky, but it doesn’t have to be. If you want juicy, flavorful chicken with a perfect sear every time, you’re in the right place.
This guide will show you simple steps to turn a basic chicken breast into a mouthwatering meal. Ready to master this skill and impress yourself (and others) in the kitchen? Keep reading, and soon you’ll wonder why you ever cooked chicken any other way.
Choosing The Right Chicken Breast
Choosing the right chicken breast is the first step to a tasty meal. It affects cooking time and flavor. Picking the best piece helps you cook evenly and enjoy juicy meat.
Consider freshness, size, and type of chicken. These details make a big difference on your cast iron skillet.
Fresh Vs Frozen
Fresh chicken breast cooks faster and tastes better. It holds moisture well for juicy results. Frozen chicken is easy to store but takes longer to cook. Thaw frozen chicken completely before cooking. Avoid cooking frozen meat directly on the skillet to prevent uneven cooking.
Size And Thickness
Choose chicken breasts that are similar in size. Thick pieces need more time on the skillet. Thin pieces cook quickly but can dry out fast. You can pound thick breasts to even thickness. This helps all parts cook at the same speed.
Organic And Free-range Options
Organic and free-range chicken often has better flavor. These chickens usually have fewer chemicals and hormones. They may cost more but can be healthier. Choose these options if you want natural taste and quality. They also tend to have firmer texture when cooked.
Credit: alwaysfromscratch.com
Preparing Chicken For Cooking
Preparing chicken breast before cooking sets the stage for a tasty meal. Proper preparation helps the chicken cook evenly and taste better. It also ensures the chicken stays juicy and tender inside the skillet. Follow these easy steps to get your chicken ready.
Trimming And Cleaning
Start by removing any fat, skin, or silver skin from the chicken breast. Use a sharp knife to trim these parts carefully. Clean the chicken under cold running water. Pat it dry with paper towels to remove moisture. Dry chicken helps achieve a nice sear in the skillet.
Brining For Juiciness
Brining adds moisture and flavor to the chicken breast. Mix water with salt and a little sugar in a bowl. Soak the chicken in this solution for at least 20 minutes. This process helps the meat stay juicy while cooking. After brining, rinse the chicken and pat it dry again.
Seasoning Basics
Seasoning is key to good flavor. Use salt and pepper as a simple base. Sprinkle both sides of the chicken evenly. You can add garlic powder, paprika, or herbs for more taste. Let the chicken sit for a few minutes so the spices stick well.
Selecting The Cast Iron Skillet
Selecting the right cast iron skillet is key to cooking perfect chicken breast. The skillet type affects heat distribution and cooking time. Choosing a skillet that fits your needs makes the process easier. Consider size, seasoning, and maintenance before buying.
Size Matters
Pick a skillet size that fits your chicken breast. A 10 to 12-inch skillet works well for one or two pieces. Too small means crowded chicken, uneven cooking. Too large makes it hard to keep heat steady. Choose a size that matches your stove and cooking amount.
Seasoned Vs New Skillets
Seasoned skillets have a natural non-stick layer. They cook chicken evenly and release food easily. New skillets need seasoning before use. Seasoning protects the skillet and improves flavor. Buying a pre-seasoned skillet saves time and effort.
Proper Maintenance
Clean your cast iron skillet with warm water and a soft brush. Avoid soap or soaking it in water. Dry it completely to stop rust. Apply a thin layer of oil after each use. Proper care keeps your skillet smooth and durable for years.

Credit: www.barleyandsage.com
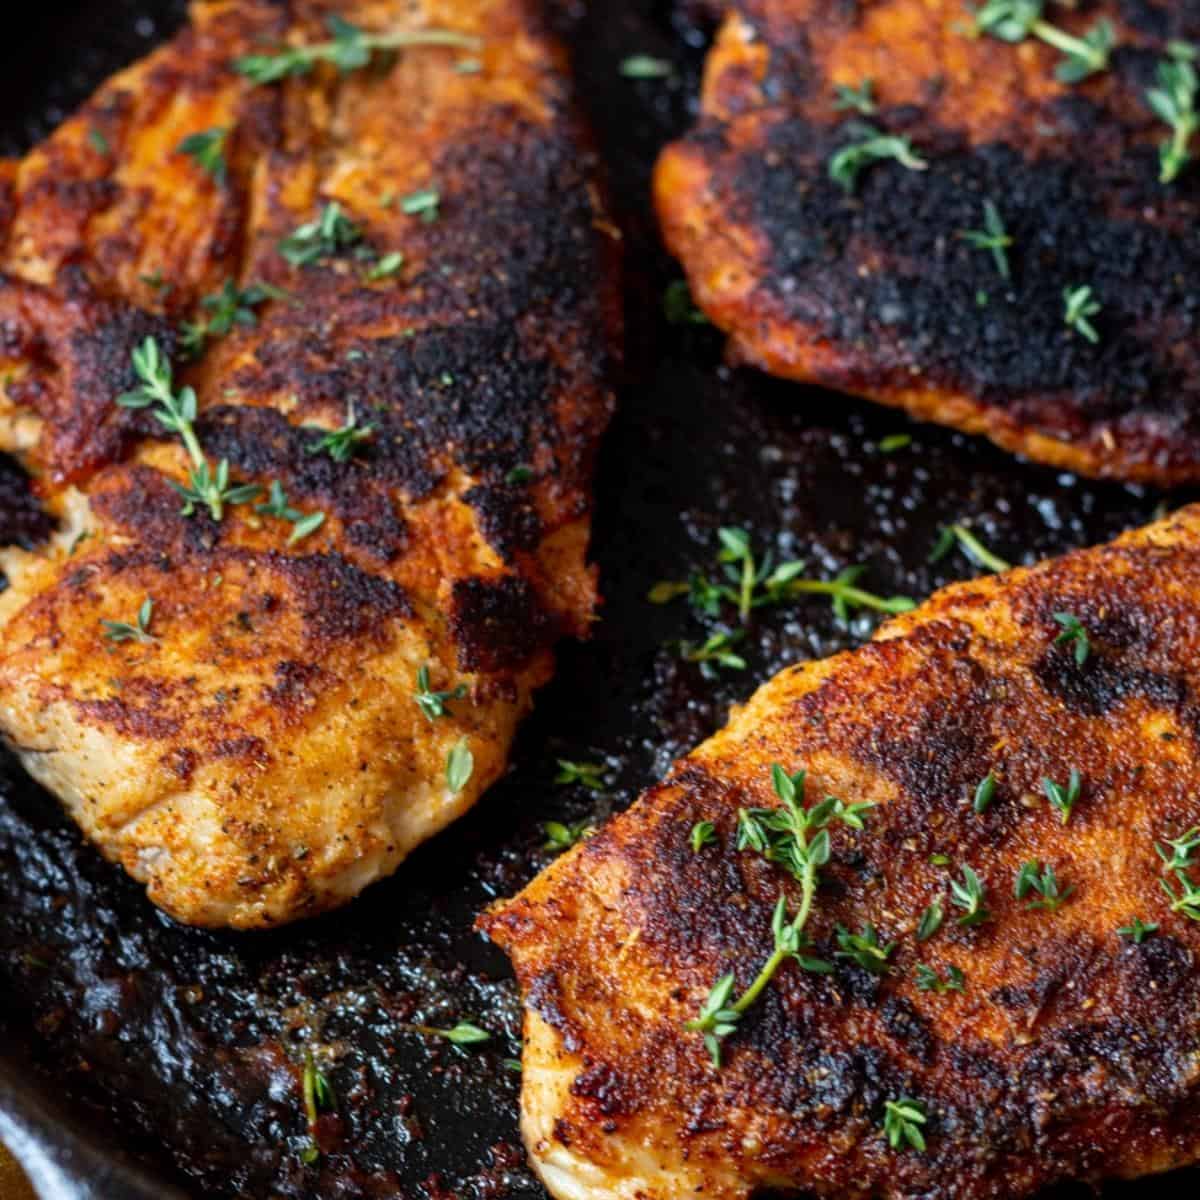
Cooking Techniques For Juicy Chicken
Cooking chicken breast on a cast iron skillet can be simple and delicious. The key is to keep the chicken juicy and full of flavor. Using the right techniques helps the chicken cook evenly and stay tender. This section shows you easy steps to get juicy chicken every time.
Preheating The Skillet
Start by heating the cast iron skillet on medium heat. Let it get hot before adding the chicken. A hot skillet creates a nice crust that locks in juices. Avoid adding chicken to a cold pan. It will stick and cook unevenly.
Using The Right Oil
Choose an oil with a high smoke point, like vegetable or canola oil. Add enough oil to coat the skillet’s surface. This prevents the chicken from sticking and helps with browning. Use just a small amount to avoid greasy chicken.
Searing The Chicken
Place the chicken breast in the hot skillet without moving it. Let it cook for 4-5 minutes until a golden crust forms. Flip the chicken gently using tongs. Sear the other side for another 4 minutes. This seals the juices inside the meat.
Finishing In The Oven
After searing, transfer the skillet to a preheated oven at 375°F (190°C). Bake for 5-10 minutes depending on thickness. This cooks the chicken evenly without drying it out. Use a meat thermometer to check for 165°F (74°C) inside.
Checking Doneness
Checking doneness is a crucial step when cooking chicken breast on a cast iron skillet. It ensures the chicken is safe to eat and tastes juicy. Overcooked chicken becomes dry and tough. Undercooked chicken can cause health risks. Use simple methods to know when the chicken is perfectly cooked.
Using A Meat Thermometer
A meat thermometer is the most accurate way to check doneness. Insert it into the thickest part of the chicken breast. The safe internal temperature should reach 165°F (75°C). Remove the chicken from heat once it hits this temperature. This method avoids guesswork and guarantees safety.
Visual And Texture Cues
Look for clear juices running from the chicken. Pink or red juices mean it needs more cooking. The chicken should look white or very light brown inside. Press the chicken gently with a finger or fork. It should feel firm but not hard. Soft or jelly-like texture means it needs more time on the skillet.
Credit: sugarandsnappeas.com
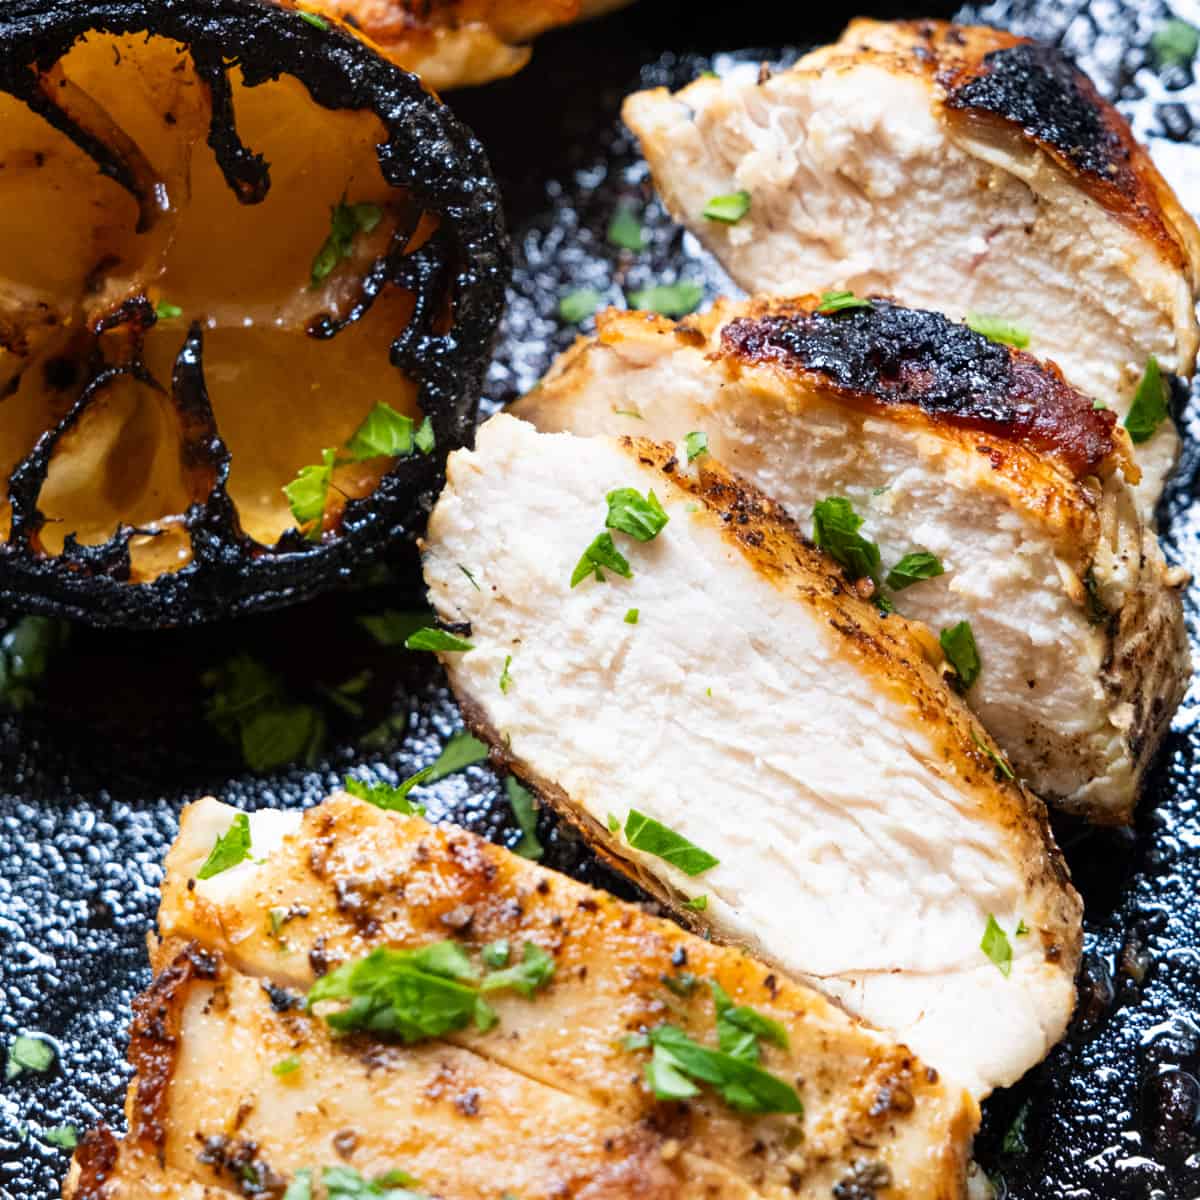
Resting And Serving
After cooking chicken breast on a cast iron skillet, resting and serving are important steps. Resting lets the juices settle inside the meat. This keeps the chicken moist and tender. Serving it right makes a big difference in taste and presentation.
Importance Of Resting
Resting allows the chicken to finish cooking evenly. The juices move back into the meat. Cutting too soon will cause the juices to run out. This makes the chicken dry and less flavorful. Let the chicken rest for 5 to 10 minutes.
Slicing Tips
Slice the chicken breast against the grain. This means cutting across the muscle fibers. It makes the meat easier to chew. Use a sharp knife for clean cuts. Slice thin pieces for better texture and taste.
Complementary Sides And Sauces
Pair the chicken with fresh vegetables or a light salad. Roasted potatoes or steamed rice also work well. Serve with sauces like garlic butter, lemon herb, or honey mustard. These add flavor without overpowering the chicken.
Troubleshooting Common Issues
Cooking chicken breast on a cast iron skillet can sometimes bring challenges. Common problems include dry meat, uneven cooking, and food sticking to the pan. These issues can affect the taste and texture of your dish. Fixing them improves your cooking results and enjoyment.
Dry Chicken Solutions
Dry chicken breast happens if it cooks too long or at too high heat. Lower the heat to medium or medium-low. Check the internal temperature with a meat thermometer. Stop cooking at 165°F (74°C). Let the chicken rest for a few minutes. This helps keep the juices inside. Marinating the chicken before cooking also adds moisture and flavor.
Uneven Cooking Fixes
Uneven cooking occurs when the chicken breast has different thickness parts. Pound the chicken to an even thickness before cooking. This makes it cook uniformly. Flip the chicken halfway through cooking. Use a lid to trap heat and help cook the chicken evenly. Avoid crowding the skillet, so heat spreads well around the meat.
Skillet Sticking Prevention
Sticking happens if the skillet is not hot enough or not oiled well. Preheat the skillet for a few minutes before adding oil. Use enough oil or butter to coat the pan surface. Let the oil heat before placing chicken in the skillet. Avoid moving the chicken too soon; wait until it releases easily. Clean and season your cast iron skillet regularly to keep its non-stick surface.
Frequently Asked Questions
How Long To Cook Chicken Breast On Cast Iron?
Cook chicken breast for 6-7 minutes per side on medium heat. Use a thermometer to ensure it reaches 165°F. Rest for 5 minutes before serving for juicy results.
Should I Use Oil When Cooking On Cast Iron?
Yes, lightly coat the skillet with oil to prevent sticking. Use oils with high smoke points, like avocado or canola oil, for best results.
How Do I Prevent Chicken From Drying Out?
Marinate chicken or pound it to even thickness. Cook over medium heat and avoid overcooking. Rest the meat before slicing to retain moisture.
Can I Cook Frozen Chicken Breast In Cast Iron?
It’s best to thaw chicken before cooking. Frozen chicken cooks unevenly and risks undercooking. Thaw overnight in the refrigerator for safety.
Conclusion
Cooking chicken breast on a cast iron skillet is simple and quick. Use medium heat and season the meat well. Let the skillet get hot before adding chicken. Cook each side until golden brown and juicy inside. Rest the chicken for a few minutes after cooking.
This method keeps the chicken tender and full of flavor. Try it for a tasty and healthy meal anytime. Enjoy your perfectly cooked chicken breast every time!